workshops
Training Course for Ansible Automation Platform
This project is maintained by ericzji
Exercise 2.6 - Workflows
Read this in other languages:  English,
  日本語.
日本語.
Ansible Tower Workflows
Workflows were introduced as a major new feature in Ansible Tower 3.1. The basic idea of a workflow is to link multiple Job Templates together. They may or may not share inventory, Playbooks or even permissions. The links can be conditional:
-
if job template A succeeds, job template B is automatically executed afterwards
-
but in case of failure, job template C will be run.
And the workflows are not even limited to Job Templates, but can also include project or inventory updates.
This enables new applications for Tower: different Job Templates can build upon each other. E.g. the networking team creates playbooks with their own content, in their own Git repository and even targeting their own inventory, while the operations team also has their own repos, playbooks and inventory.
In this lab you’ll learn how to setup a workflow.
Lab Scenario
You have two departements in your organization:
-
The web operations team that is developing Playbooks in their own Git repository.
-
The web applications team, that develops JSP web applications for Tomcat in their Git repository.
When there is a new Tomcat server to deploy, two things need to happen:
-
Tomcat needs to be installed, the firewall needs to be opened and Tomcat should get started.
-
The most recent version of the web application needs to be deployed.
To make things somewhat easier for you, everything needed already exists in a Github repository: Playbooks, JSP-files etc. You just need to glue it together.
Note
In this example we use two different branches of the same repository for the content of the separate teams. In reality the structure of your SCM repositories depends on a lot of factors and could be different.
Set up Projects
First you have to set up the Git repo as Projects like you normally would. You have done this before, try to do this on your own. Detailed instructions can be found below.
Warning
If you are still logged in as user **wweb, log out of and log in as user admin again.**
-
Create the project for web operations:
-
It should be named Webops Git Repo
-
The URL to access the repo is https://github.com/ansible/workshop-examples.git
-
The SCM BRANCH/TAG/COMMIT is webops
-
-
Create the project for the application developers:
-
It should be named Webdev Git Repo
-
The URL to access the repo is https://github.com/ansible/workshop-examples.git
-
The SCM BRANCH/TAG/COMMIT is webdev
-
Warning
Solution Below
-
Create the project for web operations. In the Projects view click the green plus button and fill in:
-
NAME: Webops Git Repo
-
ORGANIZATION: Default
-
SCM TYPE: Git
-
SCM URL: https://github.com/ansible/workshop-examples.git
-
SCM BRANCH/TAG/COMMIT: webops
-
SCM UPDATE OPTIONS: Tick all three boxes.
-
-
Click SAVE
-
Create the project for the application developers. In the Projects view click the green plus button and fill in:
-
NAME: Webdev Git Repo
-
ORGANIZATION: Default
-
SCM TYPE: Git
-
SCM URL: https://github.com/ansible/workshop-examples.git
-
SCM BRANCH/TAG/COMMIT: webdev
-
SCM UPDATE OPTIONS: Tick all three boxes.
-
-
Click SAVE
Set up Job Templates
Now you have to create Job Templates like you would for “normal” Jobs.
-
Go to the Templates view, click the green plus button and choose Job Template:
-
NAME: Tomcat Deploy
-
JOB TYPE: Run
-
INVENTORY: Workshop Inventory
-
PROJECT: Webops Git Repo
-
PLAYBOOK:
rhel/webops/tomcat.yml -
CREDENTIAL: Workshop Credentials
-
OPTIONS: Enable privilege escalation
-
-
Click SAVE
-
Go to the Templates view, click the green plus button and choose Job Template:
-
NAME: Web App Deploy
-
JOB TYPE: Run
-
INVENTORY: Workshop Inventory
-
PROJECT: Webdev Git Repo
-
PLAYBOOK:
rhel/webdev/create_jsp.yml -
CREDENTIALS: Workshop Credentials
-
OPTIONS: Enable privilege escalation
-
-
Click SAVE
Tip
If you want to know what the Playbooks look like, check out the Github URL and switch to the appropriate branches.
Set up the Workflow
And now you finally set up the workflow. Workflows are configured in the Templates view, you might have noticed you can choose between Job Template and Workflow Template when adding a template so this is finally making sense.
-
Go to the Templates view and click the the green plus button. This time choose Workflow Template
-
NAME: Deploy Webapp Server
-
ORGANIZATION: Default
-
-
Click SAVE
-
After saving the template the Workflow Visualizer opens to allow you to build a workflow. You can later open the Workflow Visualizer again by using the button on the template details page.
-
Click on the START button, a new node opens. To the right you can assign an action to the node, you can choose between JOBS, PROJECT SYNC and INVENTORY SYNC.
-
In this lab we’ll link Jobs together, so select the Tomcat Deploy job and click SELECT.
-
The node gets annotated with the name of the job. Hover the mouse pointer over the node, you’ll see a red x, a green + and a blue chain-symbol appear.
Tip
Using the red “x” allows you to remove the node, the green plus lets you add the next node and the chain-symbol links to another node .
-
Click the green + sign
-
Choose Web App Deploy as the next Job (you might have to switch to the next page)
-
Leave Type set to On Success
Tip
The type allows for more complex workflows. You could lay out different execution paths for successful and for failed Playbook runs.
-
Click SELECT
-
Click SAVE in the WORKFLOW VISUALIZER view
-
Click SAVE in the Workflow Template view
Tip
The Workflow Visualizer has options for setting up more advanced workflows, please refer to the documentation.
And Action
Your workflow is ready to go, launch it.
- Click the blue LAUNCH button directly or go to the the Templates view and launch the Deploy Webapp Server workflow by clicking the rocket icon.
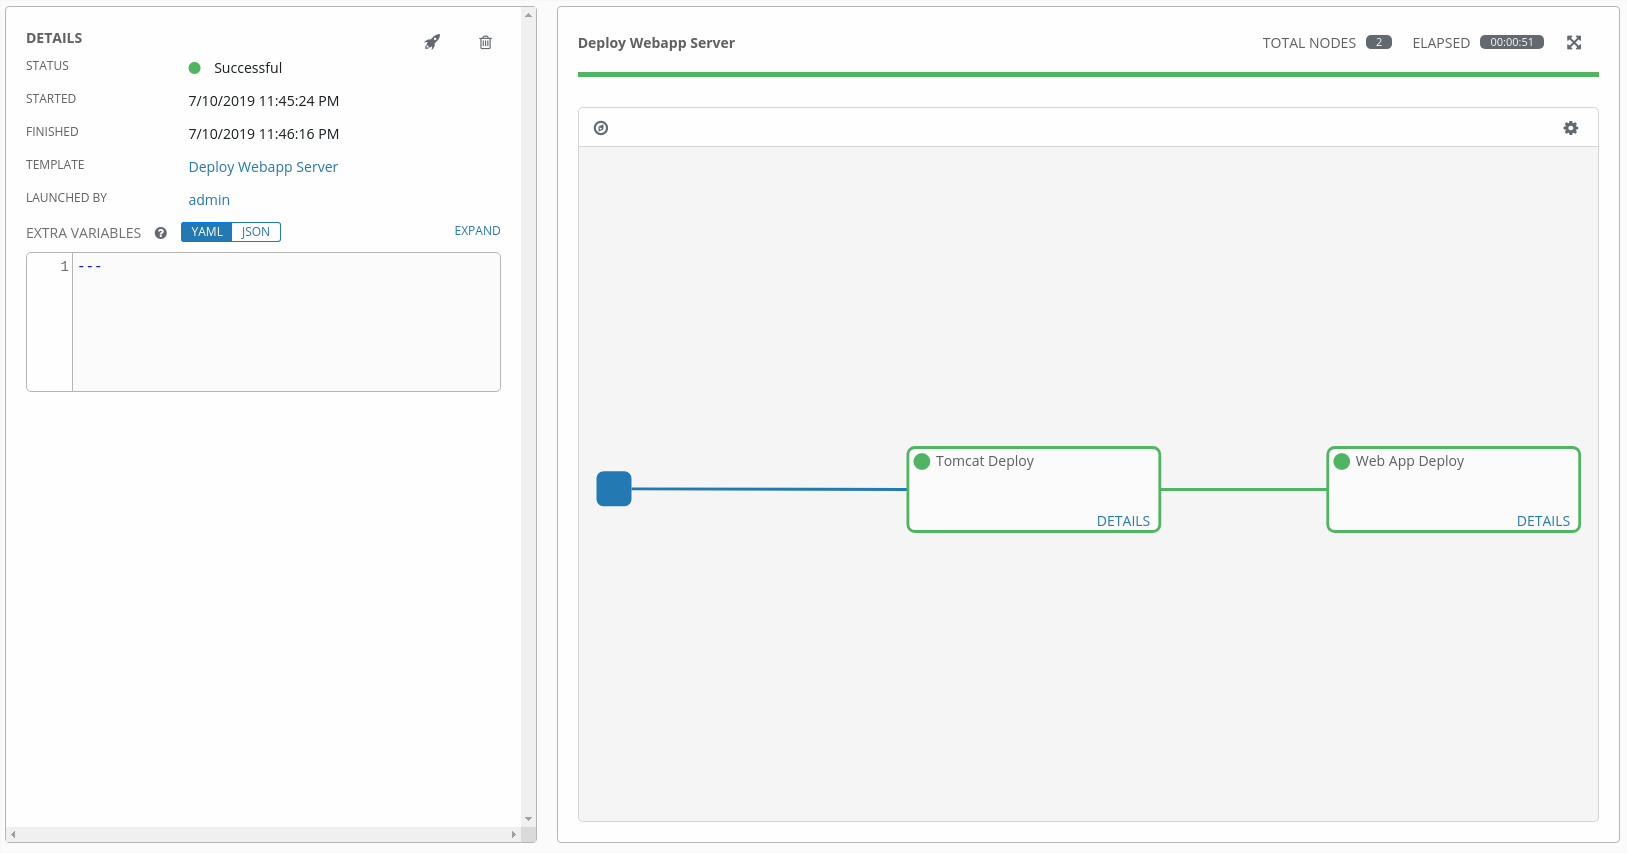
Note how the workflow run is shown in the job view. In contrast to a normal job template job execution this time there is no playbook output on the right, but a visual representation of the different workflow steps. If you want to look at the actual playbooks behind that, click DETAILS in each step. If you want to get back from a details view to the corresponding workflow, click the  in the JOB TEMPLATE line in the DETAILS part on the left side of the job overview.
After the job was finished, check if everything worked fine: log into node1, node2 or node3 from your control host and run:
$ curl http://localhost:8080/coolapp/
Tip
You might have to wait a couple of minutes until Tomcat answers requests.
Click here to return to the Ansible for Red Hat Enterprise Linux Workshop